1. Installing the Extension
Open Chrome and go to Settings → Extensions → Open Chrome Web Store.
In the search bar, type FoxyProxy Basic, install the extension, and add it to Chrome.
2. Opening the Extension Settings
Open a new tab in your browser and go to the FoxyProxy Basic settings.

3. Adding a New Proxy
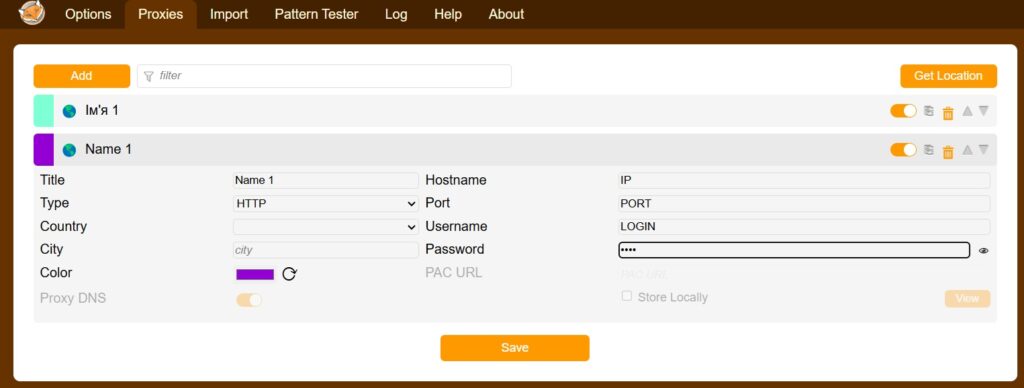
Go to the Proxies tab and click “Add”.

4. Filling in the Parameters
Enter:
Password
Title (any name)
Host or IP address (proxy IP)
Port
Username (login)
After entering the details, click “Save”.
Important: The port depends on the type of proxy you are using. All the details will be sent to your email after payment. You can also find them in the “Products/Services” section of your personal account.

5. Activating the Proxy and Checking the IP
Select the created profile in the new browser tab and check if the IP address has changed, for example, on the website 2ip.ua.

0 Comments