Proxifier is a software for Windows and macOS that allows redirecting any application’s internet traffic through a proxy server. This is especially useful for programs that do not support proxies by default.
What Types of Proxies Does Proxifier Support
Proxifier supports the following types of proxy servers:
- SOCKS v4 / v4a
- SOCKS v5 — with authentication support
- HTTPS (HTTP CONNECT)
HTTP proxies are suitable only for HTTP/HTTPS traffic, such as:
- Browsers (Chrome, Firefox, Edge, etc.)
- Some download managers
- Other applications that natively support HTTP proxies
So, if you want to route all traffic — choose SOCKS5.
HTTP is only suitable for basic browser tasks or specific tools.
How to Set Up a Proxy in Proxifier
Step 1. Download and Install Proxifier
You can download the latest version from the official website: https://www.proxifier.com. The program offers a free trial period.
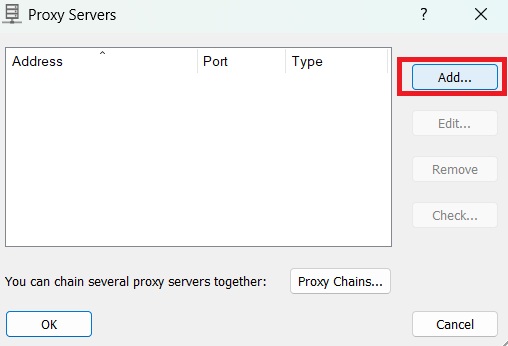
Step 2. Launch the Program and Open Profile > Proxy Servers
In the window, click “Add” to add a new proxy server.
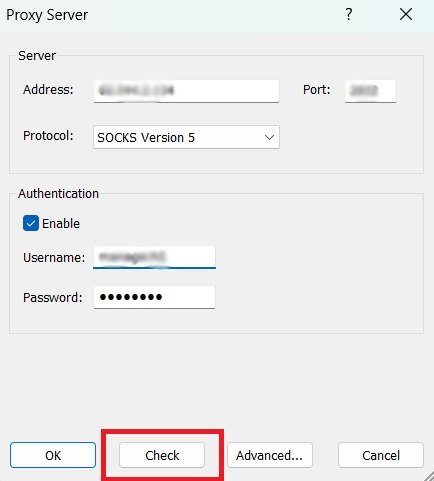
Step 3. Enter Proxy Details
- Address: Proxy IP or domain (e.g.,
123.456.789.101) - Port: Port number
- Protocol: Choose
SOCKS Version 5orHTTPS, depending on your proxy type - Authentication: Check the box if login and password are required
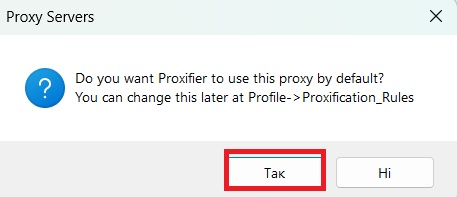
Step 4. Save the Settings
Click OK to save the proxy. Proxifier will offer to use the specified proxy server by default for all applications.
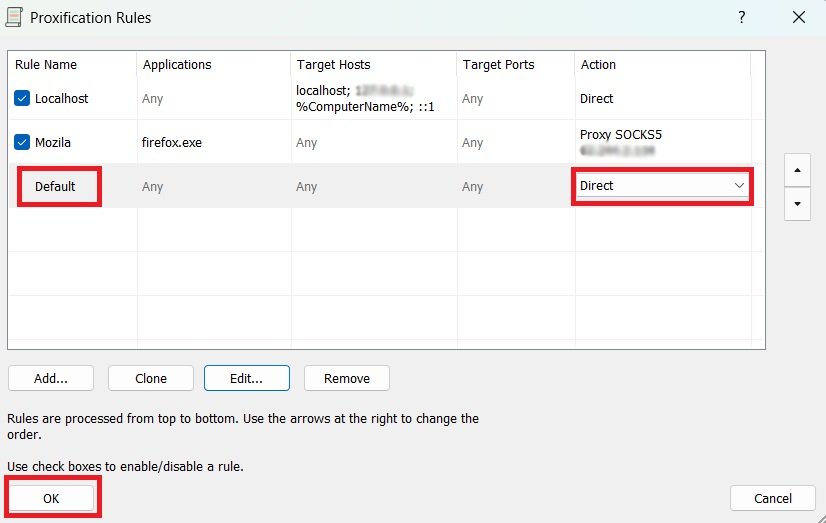
Step 5. Create a Rule for a Specific Application
To configure the proxy for a specific application only — you need to create a rule. Go to Profile > Proxification Rules:
- Click Add
- In the “Applications” field, select the application (e.g.,
firefox.exe) - In the “Action” field, choose the added proxy
- Click OK
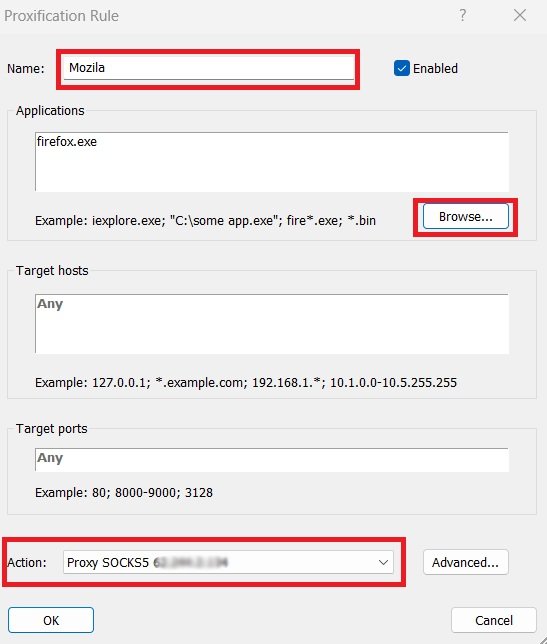
5. You need to disable the proxy settings set by default for all applications. Go to Profile > Proxification Rules. For the Default rule, change the Action to Direct. With this setup, the proxy will only work for the Mozilla browser in this example.
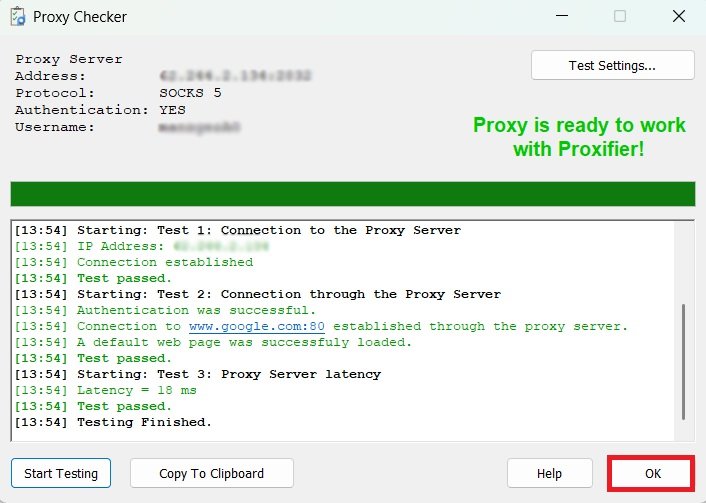
Step 6. Test the Connection
Go to Profile > Proxy Servers, select your proxy and click Check — if the connection is successful, a green status will appear.
For maximum stability and security, we recommend using trusted private proxy servers from internetspace.com.ua
0 Comments